
Valve Gear
(A bit of a disclaimer: what's found on here is basically copied from another site, which I'll link it here at some point. The reason for this page's existence is just to streamline and simplify the wording, give more straightforward equations, and explain where certain numbers come from as the original site wasn't too clear on these things.
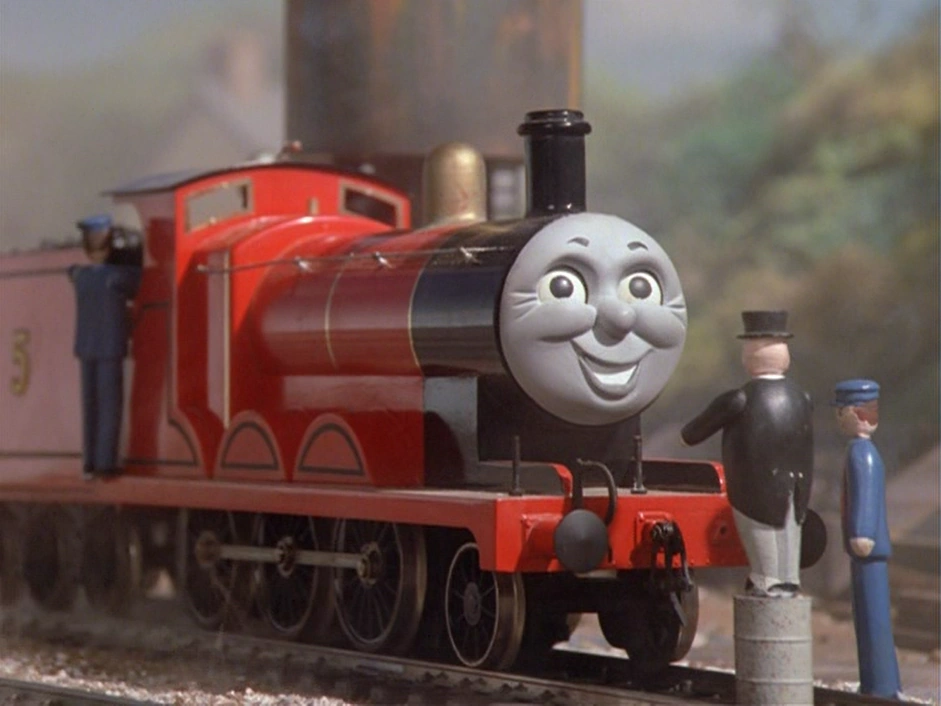
I will be using James the Red engine's measurements as an example alongside equations for photo-context when I complete this) also my goat deaven aka spitfire08 made a script for it https://github.com/Spitfirebruh/Valve-Gear-Calculator i havent tested it yet but i will eventually to see if it works
(EVERYTHING WILL BE IN IMPERIAL)
Dimensions & Planning
Glossary + Abreviations
- drive wheel(D): the wheel where the power is exerted, where the rods go, also known as driver,abereviation will be diameter
- stroke(S): length of piston
- bore(B): whith of piston
- (BA):Bore area
- T:travel, the amount the valve spins from back and foward
- steam chest: where the valve is
- middle travel: when the piston head is at the middle, different from rods down
- lap(lap): amount that is covering the port at middle travel
- lead(lead): amount by which the port is open at dead center
- FPM:feet per minute
first your going to need a few things beforehand:
- drive wheel diameter
- stroke and bore
- wheel and valve placement
using james as a base, it will be using 5 foot 6 inch drivers, using 20.5 inch x 26 inch pistons. which will be
- 66 inch driver diameter
- 20.5 bore
- 26 stroke
- if you do it properly, specific mesurements dont matter entierly, jus that they are already pinned down
so first, we need wheel speed, which is diameter of wheel(in) times Pi times 336 times 60 divided by 12,this will equal mph/diameter times 5280 feet which will look like this if you want to put it in google
- (D*Pi*336*60)/12=mph*5280
example:
for port area, we will start with this equation this will be the piston speed in FPM. which is 336 times the sum of 2 times the piston stroke(in) divided by 12
- (336*2*S)/12
- (3362*26)/12=1456 FPM
next we need volume swept by piston, which will be the piston speed times the area of the piston, which will need 1 other equations first, the area of the Cylinder bore. which is Pi times the sum of the radius of the bore squared, which is
- Pi*(B/2)^2
- Pi*(20.5/ 2)^2= 330.063578
now that we have that, we input this number into the equation for the volume swept by the piston, which will be fpm times bore area divided by 12 squared
- (FPM*BA)/12^2
- (1456*330.063578)/144=3337.30951089
now that we have the volume of how much cubic feet the piston moves per minute,we can finally get to port size, it will be volume per minute divided by 7874, which is the average speeed of steam in meters per second (40)/p>
- VPM/FPM
- 3337.30951089/7874=0.42383915556
convert to inches
- area of port*(12^2)=X
- 0.42383915556*144=61.0328384006
for the shape of the port, id recomend a wider port than long, but for here, i will just go for 18 inches wide, it will still need to be the same as the area
now we move onto some of the more complicated looking stuff, now pull out a CAD program or vector program with mesurements, you will need it for the next part, unless your very skilled at mesurement drawing in real life
- step 1: create a circle, mark right as A,go counter clockwise for B,C,D and a circle at A that is equal to port length
- diameter will eventually be full travel, but we dont know that, so we assume the travel, to be good it should be around 5.5 to 7.5
- step 2: make a line from A called A.E. being 85% of A.C., or whatever maximum cutoff you decided on.
- step 3: create a perpendicular line from E to the circle, the end point being F.
- step 4: create a line from F that is tangent to the bottom of circle A.
- step 5: make a line that is perpendicular from F.G. from the center of the circle, this is O.J., the length of the center to where O.J intersects F.G. will be the LAP, add this to the length of the port opening and you get half travel
- step 6, find out how much it will overrun, this is done simply by subtracting estemated travel by lap+lead, in this,estamted travel is still full travel though, unless you want to do it all again with the new half travel, but a longer travel also helps with maintaining boiler pressure.
so you add both the lap and port length, being
- lap + lead
- 3.390713244 + 0.858397759 = 4.249111003
now we mesure where the port is placed, we take the estemated half travel, subract port length from it, and then move it from the valve end that distance, in our case,
- HT - lead
- 4.5-4.249111003 = 1.62330984828
if it is ever negative, just make circle ABCD bigger until it isnt. now we find out the combination lever, the vertical rod that is near the crosshead of a piston, the equation being:
- (S*HT)/(2*((lap+lead)/2))
- (26*4.5)/(2*(4.249111003/2))=27.5351714553
now we move onto the next part, which is making the actual valve gear part, this will take multiple steps, but not much more math,because if you have a CAD or vector program, it will be way simpler, it is generally advised to put the piston under the smokebox, this is so that the steam pipe and exhaust align with the piston, to make the piston do what it should do., if it is kinda fucked then just give a different number till it works
- step 1, we go onto laying out the valve gear, first, create a centerline for the piston,crosshead,main rod,and axle centers, make sure that the centers for the crosshead and main rod attachement can acomodate for the travel of the piston, next, make a center line for the spindle, id recomend giving some space between the steam chest and piston, so that there can be some material to seperate it, you could calculate the mesurements, but for now just eyeball it to 2 inches
- step 2,make the line for the combination lever, using the same mesurement for what was calculated right before, attach the valve spindle line the amount that half travel is from the top
- step 3, put 2 lines across from the combination lever, the distance being half travel from the combination,
- step 4, make a arc thats centered on the top of the combination lever, the size of the arc should be the stroke length, and the radius should be the combination lever
- step 5, make 2 lines that are equal to the combination attached to the 2 ends of the arc and at the top of the top od the combination lever, this will be its extremes, in this , you should move the point where the 2 lap+lead lines intersect them to the valve spindle centerline
- step 6, decide where the radius rod is, it should be drawn from the top of the combination lever, it should be horizontal for optimal designing, but other angles could work
- step 7, make a arc from the point on the radius rod closest to the piston to the far end
- step 8, like the lap+lead lines, add 2 more lines that are actual half travel from the combination lever, make 2 more lines that are attached to it, equal to the combination lever, and also attached to the bottom end of the combination lever, do the same on the other side
- step 9, make a arc from the top ends of the 2 lines that are equal distance to the radius rod
- step 10, draw a line tangent to the radius rod arc, and create copies that are rotated 20 degrees from each side, adding to to a total swing of 40
- step 11, make arcs that are tangent and touching the end of the radius rod, the arcs beign equal to the radius rod
- step 11.5,if neccecary, move the end of the radius rod to allow better swing, be careful though, since to much of either is bad, so try and land for somewhere in the middle
- step 12, make lines from the end of the radius rod to where the combination and the radius arcs meet at, where ever is the longest is going to be the distance of the expansion link times 2
- step 13, mirror it across the arc line its attached to, then move it 20 degrees, and then do it again
- step 14, lock them all, and create the line for the foot link on all of them, make them equal, and add 1 line from the end of the foot link,and a circle around the axle center, the one where the bottom is leaning back, attach it to the far right of the circle, the center one should be attached to the far top, and the one leaning forward should be attached to the far left, then make all the lines equal to eachother, add a construction line from the center of the expansion link, to the foot link to ecentric rod joint
- step 15, create the union link, create a line from the combination lever to the crosshead, create 2 more lines from the 2 ends of the arc, and make their distance from eachother the size of the stroke, take
- step 16, make a arc from the crosshead to the axle center, the angle from it interceting the ecentric crank circle to the axle center will be the amount you will need to move back to have rods down
now, you have finished all the steps for planing, make all lines that arent the rods at center (with the exception of the expansion link, use the one where the bottom is leaning back, and make a copy of the line and rotate it 180 degrees around the center of the expansion link) to construction,trim them, or delete them, and model them all.
building
building the valve gear is significantly more simpler and no math is truly reqquired, unless you want to balance the weights, but that wont be nececcary, unfortunately, james's proportions makes it so that the expansion link will most likely interfere with any realistic size for material that could withstand more than 2 pounds of pressure, fortunately, we can move parts to the side since james is a dual piston engine, if it is like james, then also account for the fact that there will be another axle in the middle of the main rod, and you will need to angle it upwards so no interference will happen and lock or blow up the valve gear, you can move the length of the piston to the crosshead as much as you want unless it interferes with the combination link.